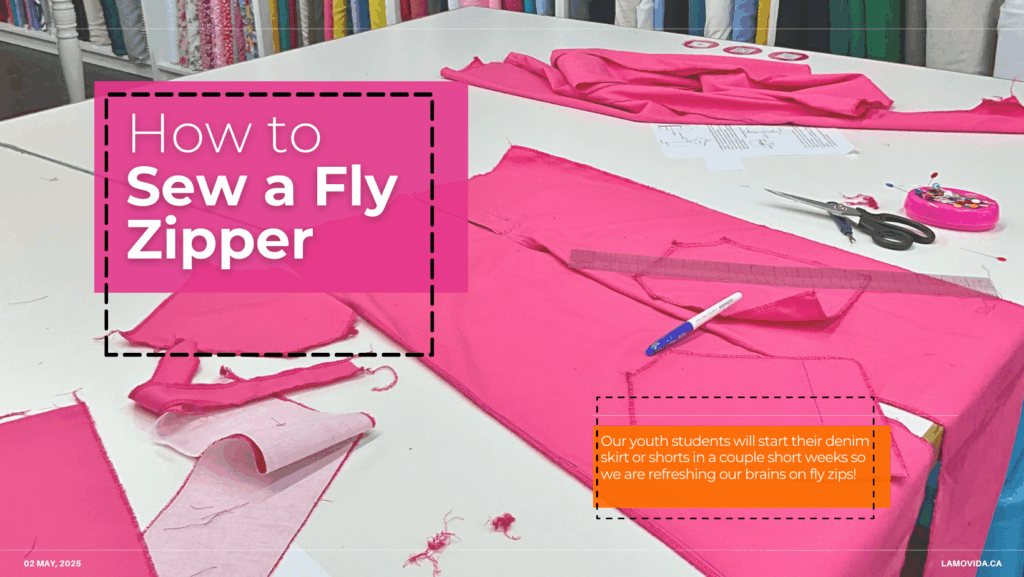
SO there is kind of this running gag that I (Samantha, Youth Sewing Instructor) am quite good at zippers and love to do them, So I always suggest them as a skill on youth projects to keep things interesting. If you don’t know though, Laurie (Founder & Creative Director) develops all of our sewing projects and makes like 99% of the patterns & samples. For good reason too as she’s been sewing and designing for like 40 years. However, Laurie every single time we do a fly front zip forgets how to put it together so she always comes to ask me, while making the samples how to put together the zip. It’s just one of those things that she needs a refresher on and it’s something ingrained into my mind, probably because I was a tailor and replaced so many. So this blog post is to help anyone who’s scared of fly front zips & for Laurie next time I yet again suggest a fly front zipper.
Sewing a fly front zipper might seem daunting at first, but with a little patience and the right guidance, it becomes a satisfying and essential skill in pants-making. This type of zipper installation is common in jeans, trousers, and shorts, giving your garment a clean, professional look. I’m gonna do my best to provide tons of extra tips and tricks on how to make this a simple beautiful sew but I also would love to suggest some books on the topic! (I LOVE sewing books as a resource and we have a collection of sewing books here at the studio but I also hoard them at home. We have been sharing the knowledge of sewing through books for such a long time so I think they are really honed methods of learning the art)!
For your consideration ‘The Sewing Book’ by Alison Smith (which we own two copies of at the studio and I own one at home).
Also if you don’t own it yet ‘Reader’s Digest Complete Guide to Sewing’ is an essential book to have in your collection and is well noted as one of the best. You can probably find it second hand for pretty cheap but I have just linked a local book seller because I think small local bookshops are so important.
This was kind of a tangent but they have good references for fly front zips and are where I learned how to do this! Maybe I’ll do another blog on my favorite sewing books. Okay, for the tutorial!
What You’ll Need:
- Pants pattern with a fly front design
- Zipper (metal or plastic, depending on the garment) We have a limited stock of zippers in person at our Vancouver fabric shop!
- Interfacing (optional) (We have a great selection of interfacings in person at our Vancouver fabric store)
- Sewing machine
- Zipper foot (also optional IMO)
- Pins or clips
- Marking tools (chalk or fabric marker)
- Iron
Step 1: Prepare Your Pieces
Ensure your front pants pieces are cut and marked according to your pattern. Most patterns will have a fly extension and notches or markings to indicate the center front and fold lines. Transferring these markings accurately will help make this process a lot more simple. Make sure you double check your seam allowances as we go on too because your pattern may use different seam allowances than ours.
It is best practice to do your fly front before you start sewing it together to your back pieces. I always do my fly front after serging all my edges.
Pro Tip: Fuse a small piece of interfacing to the wrong side of the fly extension to provide structure and prevent stretching. I would say this is essential if your fabric is thinner or has some spandex in it, you don’t really need this if you’re using a 100% cotton heavy weight denim.
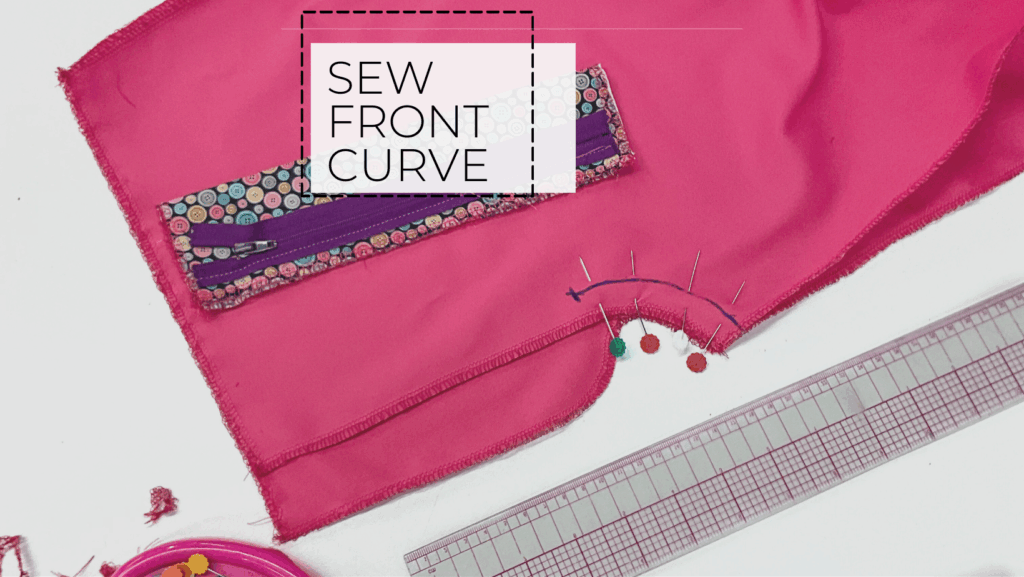
Step 2: Sew the Front Crotch Curve
With right sides together, pin the front crotch seam from the bottom up to the zipper stop mark (this is usually a notch or line on your pattern, but we often do ⅝” up from the start of the curve, as pictured). Sew using a regular stitch (2.5mm) below the zipper point. In design school they told us to switch to a 1mm stitch length about ½” before the end of our stitch line to make sure this seam is really strong but this is also up to you. Some people suggest basting all the way up to the waist line after this normal stitch but I never mess with it. Feel free to experiment to determine which way you like better.
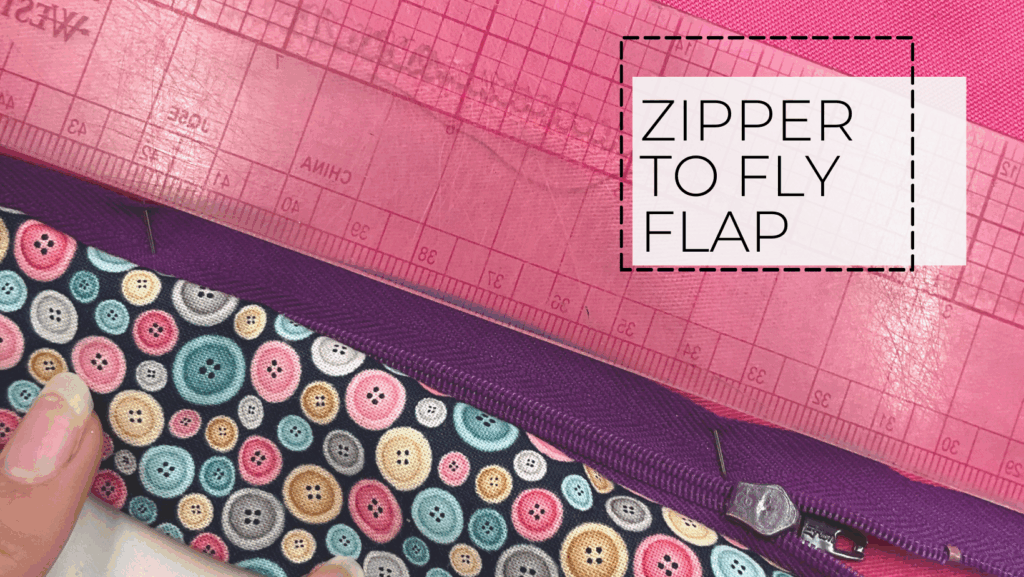
Step 3: Attach the Zipper
Open the fly area and lay your pants flat, right side up.
- Left Side (when worn): Place the zipper face down on the left fly extension (the wearer’s left). Align the edge of the zipper tape with the edge of the extension. Pin and sew using a zipper foot. Note: how close to the edge your zipper tape will go depends on how wide your zipper tape is and your seam allowance, please refer to your pattern to double check that your zipper teeth will line up with the seam allowance. In our example I needed the teeth to be at ⅝” and my zipper tape was not wide enough so I shifted my tape over ⅜”.
- Sandwich your zip with your fly shield: Most fly fronts will have a zipper shield to protect your crotch from the zip, this is typically a rectangle shape. You will line up your raw edge to the flat front sandwiching your zipper and stitching right along your other stitch line.
- Flip back & topstitch: Fold your fly shield and zip right sides out and topstitch close to the edge of the zip.
Nervous about where to start or need one on one instruction to help you figure this out? Visit us for private lessons and get professional sewing help!
Step 4: Secure the Right Side
Fold the right fly extension under, so the zipper is covered when viewed from the front. Your topstitched left side should now be hidden underneath.
Pin the right extension to the zipper tape (only to the tape, not to the front of the pants) and sew close to the edge. This ensures the zipper opens and closes smoothly.
This can take a few tries to get to line up properly so I would start by basting (using a 5.0mm stitch length) this piece in.
Step 5: Topstitch the Fly
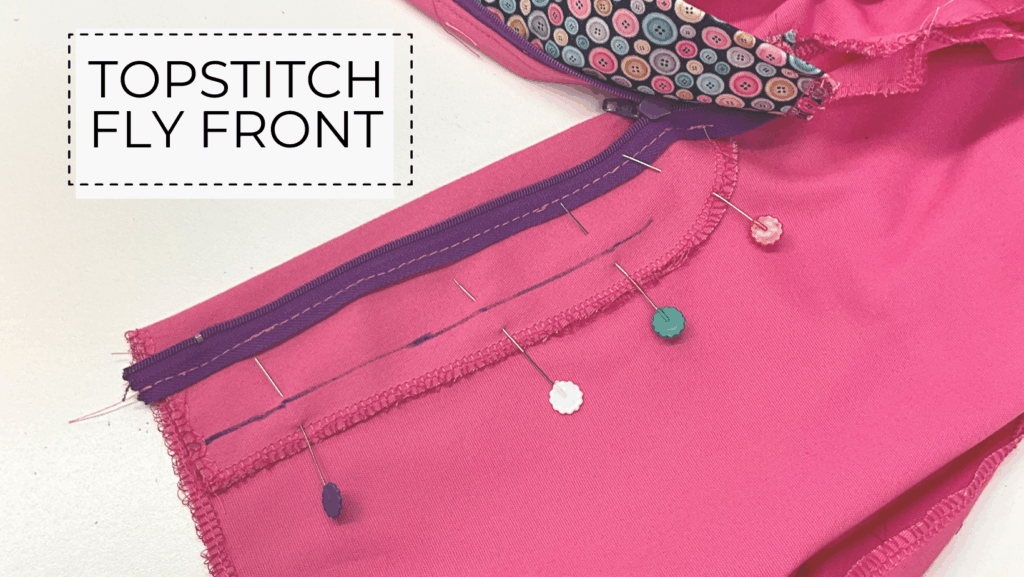
Now it’s time to create that signature curved topstitch!
Using your pattern or a curved ruler, draw a guide on the front of the pants. Typically this line will be a specific seam allowance over, ours is ⅝” in from the raw edge of the fly flap. Fold the zipper shield out of your way (I like to pin it back so I don’t accidentally get it caught in my topstitch). Topstitch from the waistline down, stopping about 1.5” up from the curve.
Then fold back your fly shield so you secure it down in the curve. Draw on your curve and sew around the fly to finish about 1” past the zipper stop.
It’s optional to do a second row of topstitching for durability and aesthetics.
Step 6: Topstitch the Crotch
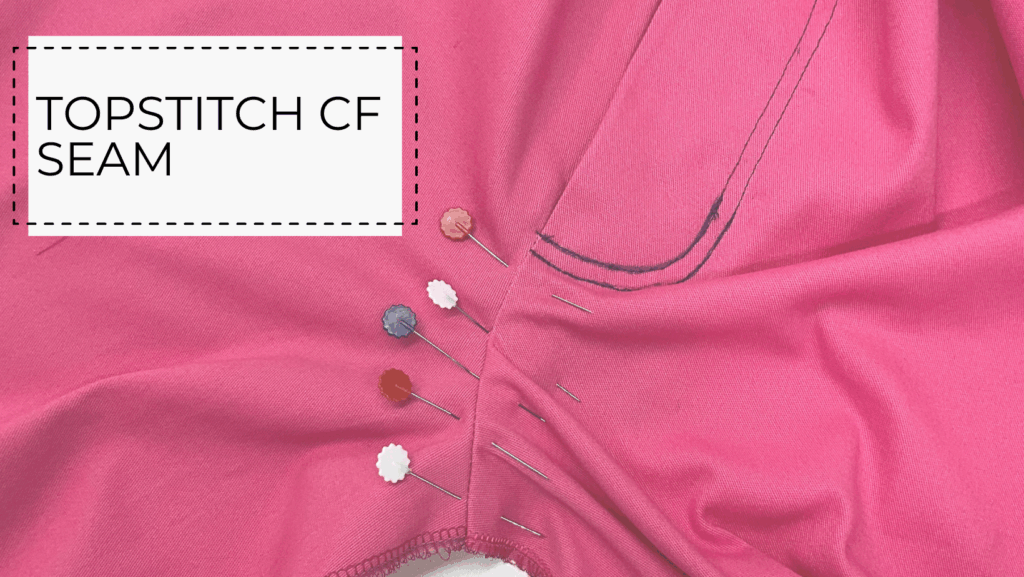
This is optional but I like to press my crotch seam allowance towards the same side of my fly and topstitch it down to prevent the seam allowance from poking my crotch.
And You’re Done!
Sewing a fly front zipper takes practice, but once you’ve done it a couple of times, I find them quite a fun sew that I’m proud I have the skill to do. The result is a clean, polished closure that elevates any pair of handmade pants or jeans.
Bonus Tips:
- Always test your zipper before sewing it in.
- Pressing at each stage helps achieve a crisp, professional look.
- Mark your topstitching with chalk to ensure clean, even lines.
Whether you’re sewing your first pair of jeans or tailoring a custom pair of trousers, mastering the fly front zipper is a big milestone in your sewing journey. I encourage you to go into this process with a ton of patience and understanding that you’re probably going to have to try and retry a few times. Practice makes perfect as they say. I wish you all the luck on your zipper sewing endeavor and as always if you ever need any help we are here!